
Showing posts with label For the guys. Show all posts
Showing posts with label For the guys. Show all posts
Monday, June 1, 2015
Green grunge
Monday, May 4, 2015
Scraps and PL

Just a clean and simple one today, for my father's birthday. These papers are somewhere between green and teal, which can be a tricky combo. Fortunately a mix of random scraps and some PL supplies did the job just right!
Monday, March 9, 2015
Enjoy the ride

-

-

Thursday, October 30, 2014
Forty

Saturday, October 4, 2014
Shine on!

Monday, September 29, 2014
Celebrate

Thursday, September 25, 2014
Hooray!

Monday, February 10, 2014
Happy birthday!

Saturday, February 1, 2014
Project Life supplies used in a different way

Monday, January 27, 2014
Play!

That blotchy red-green tag was made by splashing two colours of Distress Stain on a non-stick baking sheet and patting the white tag into it. Adding some metallic stain, in this case silver, gives you a nice shine. I've made several tags, and it's a fun process. You haven't got much control over the result, so it's a case of getting messy and just experiment away.
Friday, January 17, 2014
A little prince

Thursday, June 27, 2013
A little baby girl

-

Thursday, June 20, 2013
Footballer Frank turns Fifty


Thursday, June 6, 2013
Someone turned 40 a while ago, apparently

Monday, April 8, 2013
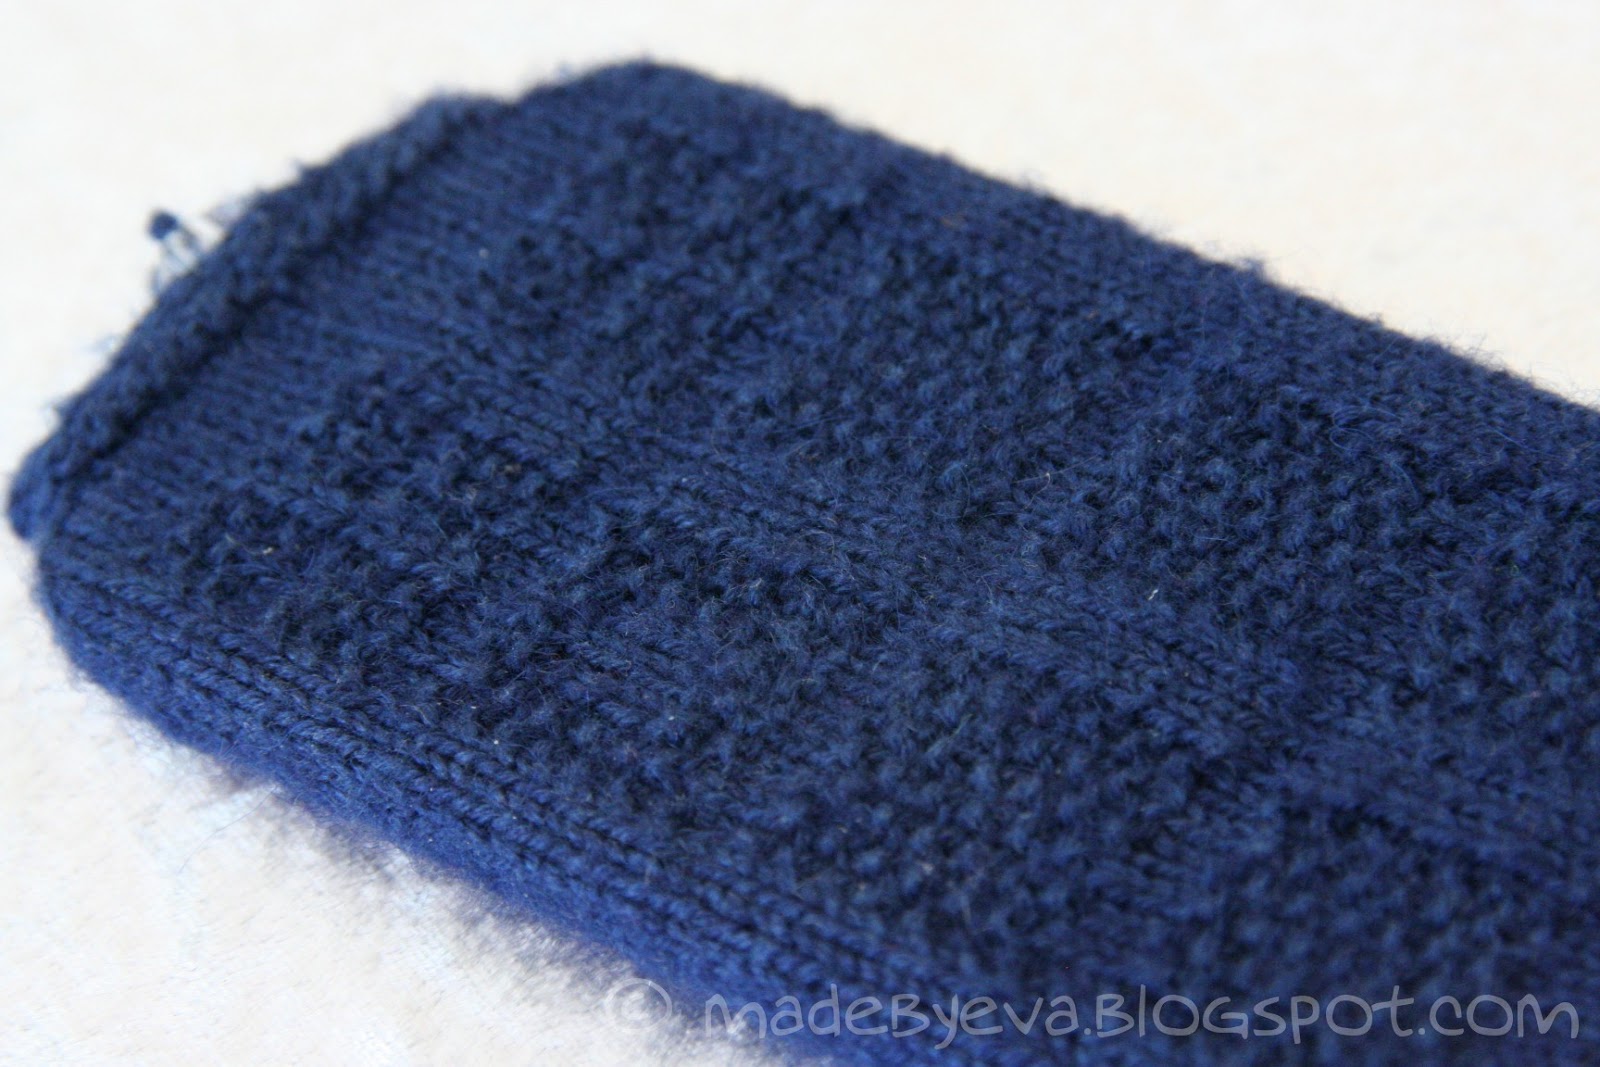
TARDIS phone cozy

There are lots of TARDIS cozies out there, but I wanted one that was more elegant, more stylish, and in a thinner yarn, and so decided to make up my own. Those who don’t watch Doctor Who (what?!?) will see this as abstract decoration, but I know better. ;)
-

-
Monday, March 18, 2013
Playing with new materials!

-
The base of this card is a pattern paper that I whitewashed with Gesso and water to lighten the colour. A few sprays of green GlimmerMist brought it to the right colour. I then went crazy with two kinds of washi tape, tearing strips and layering them roughly along the diagonal. Some stamping here and there adds to the detail. And then I added the molding paste, and the stars aligned. The hardened paste has absorbed some of the colour of whatever medium it rests on, so parts of it are faintly green from the GlimmerMist, and some are tan from the stamping ink. The parts that sits on the washi tape are still crisp white. It all adds to the drama!
-

There are so many layers of mediums on those chipboard numbers that I can't really remember them all... What's visible now is white Crackle Paint that's tainted green and brown by the Distress Ink layer below. Pretty good in the end, but it took a few tries to get the right look.
Monday, March 11, 2013
Water bottle cozies


-
Now, this worked just fine, but I noticed a couple of things I knew I could find a solution to.
First: A bottle of ice water is, well, cold. No surprise there. Which made my fingers cold, which made my patients jump and twitch when I touched them, which, in turn, made taking x-rays of them a little bit tricky.
Second: If I left the bottle on a desk somewhere and didn't come back to it for an hour or so, it would collect quite an impressive puddle of condensed water. Which was merely inconvenient when the water dripped down my uniform making it half transparent, but really quite dangerous when the water gravitated towards electrical stuff (and that stuff's pretty much everywhere in a radiology ward).
Third: On hot days, there just wouldn't be enough ice to last the shift, even if I froze the bottle nearly full.
-
The bottle cozy not only keeps the water cold for longer, but is also nice to the touch and completely eliminates condensation. I brought it along on a canoe trip this summer, and enjoyed ice cold lake water the whole day, to the slight envy of my friend. I made her and her husband one each for christmas. :) Also, my cousin got one, but I seem to have forgotten to photograph it... Not a very exciting object, I suppose. I've got two myself, one for the 0,7 litre Imsdal bottle, and one for the 0,5 litre bottle.
-
How to make them, you ask? Well, it goes like this. Find a medium to thick yarn of 100% new wool, a hook that's one size smaller than recommended for the yarn. Make a tight spiral for the base, and just stop increasing when you start the wall. The cozy should be slightly wider and taller than your bottle (that's a precise technical measurement term, that). Hand felt in soapy water until snug (testing the fit regularly) and allow to dry on the bottle (refilling the bottle with warm water now and then speeds up that process). Ta-da, enjoy ice cold water anywhere. :) Ravelry links one, two, and three.
-


Thursday, January 31, 2013
Monstrosity

Having made one sensible and neutral (and boring?) card for my brother's 30th birthday, I decided to go nuts on the other. My parents gave the first one, and I figured I should be his crazy sister and give him this montrosity! :)
The picture doesn't show it very well, but the chipboard "30" is painted in crackle paint and rubbed with some white ink to lighten it a bit. The monster paper has some sparkle in it and the "hey!" is lifted with 3mm pads.
Saturday, January 26, 2013
The Latte stack to the rescue - again

Wow, this was made a long time ago... It's for my brother's birthday, which is in October... Wow. Well, it's about time it made it to the blog then! :)
Clean and simple again, what else to do for a thirty year old man? The DCVW Latte stack has been my go-to stack in these cases for a while, the colours and patterns are so great. Not quite what I'd expect from the name, but I'm not the one to judge a stack by its cover. ;)
Tuesday, October 9, 2012
Finally, some grunge!

Ah, it's been too long. I love grunge, but for some reason don't do it often enough! The 60th birthday of a man is a good reason to grunge it up though. He likes bicycles and I actually managed to find some bicycle related papers! Add some gears, baker's twine, Scrapper's Floss, chipboard numbers and some other leftovers, brighten it with splatters of white Crackle Paint, and you've got a detailed, layered look that works on a man's card. In fact, I wouldn't mind recieving this myself, even though I'm neither 60 years old or a man. ;) But that's me, and I realise I'm surely a minority in the card making community in that respect. There's room for all! :)
Subscribe to:
Posts (Atom)


